Roof Replacement Insurance Claim: How To File Successfully
Elisa DeFoe • June 10, 2025
First, the TL;DR:
Successfully filing a roof replacement insurance claim, especially for Colorado homeowners facing severe weather, requires a methodical approach. Begin by thoroughly assessing roof damage yourself, weighing repair costs against your deductible, and understanding your policy's specifics, including Replacement Cost Value (RCV) versus Actual Cash Value (ACV) and any exclusions. Meticulously document all damage with high-resolution photos, a detailed log, and leverage NOAA's historical storm data to substantiate your claim. Schedule a professional roof inspection with a reputable contractor to obtain an accurate estimate, then meticulously prepare and file your claim, ensuring all forms are accurate and deadlines are met. During the adjuster's visit, be present to highlight all damage. Critically review and negotiate the settlement offer, seeking professional help if significant discrepancies arise. Finally, engage a trusted contractor for the roof replacement, managing payments and overseeing the project to completion. Post-claim, understand potential premium impacts, prioritize long-term maintenance, and know how to resolve any future disputes by tracking deadlines and utilizing regulatory channels.

How to Successfully File A Roof Replacement Insurance Claim
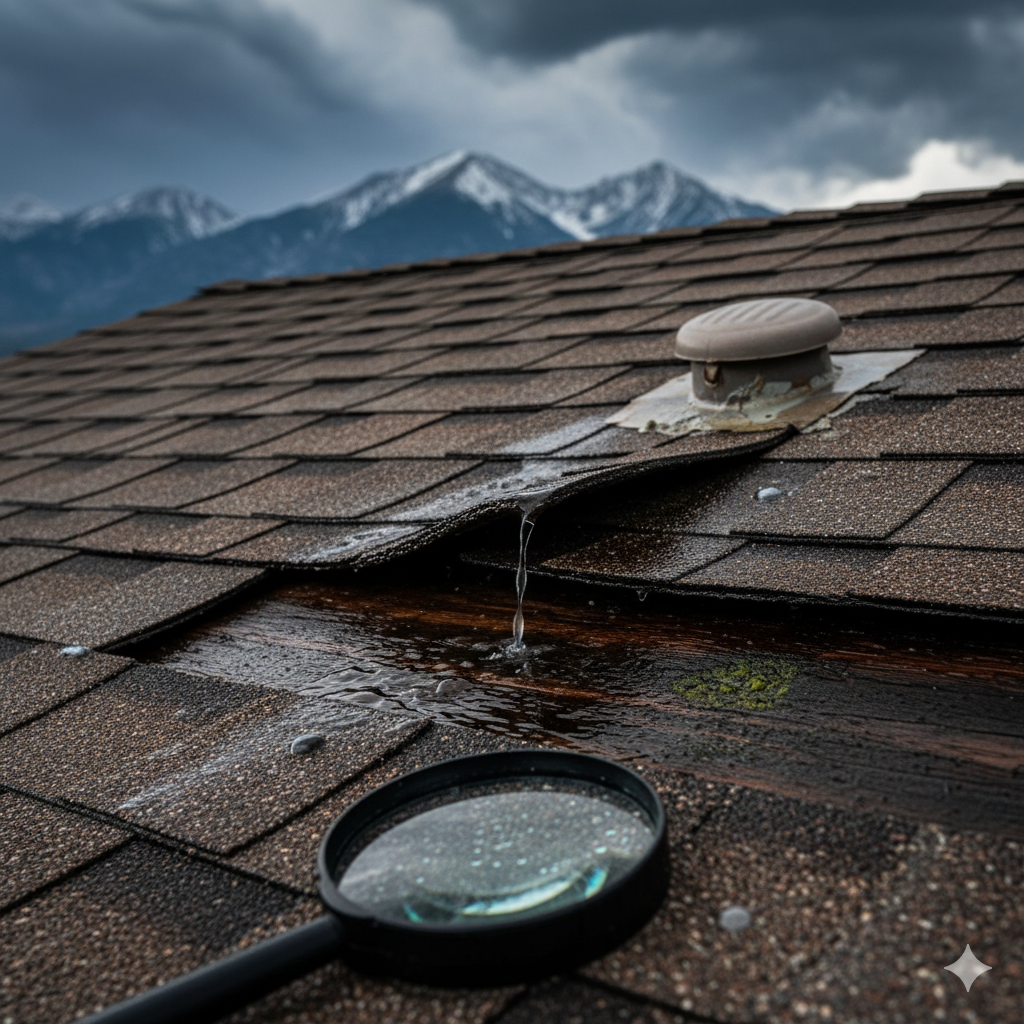
A sudden hailstorm leaves your shingles battered, gutters overflowing with granules, and a sinking feeling in your gut: How much will this cost, and will your insurance actually help? For Colorado homeowners, severe weather isn't just a seasonal worry—it's an ongoing test of your roof's resilience and your own peace of mind. Yet, when damage strikes, many are left navigating a maze of policy fine print, documentation demands, and insurer red tape, all while trying to protect their most valuable investment.
Filing a roof replacement insurance claim can feel overwhelming, but with the right approach, you can move from uncertainty to clarity—and secure the coverage you deserve. This guide breaks down each step of the process: from inspecting your roof and understanding your policy, to harnessing weather data and working with a trusted, veteran-owned contractor. Along the way, you’ll discover practical strategies to document your loss, communicate with adjusters, and avoid common pitfalls that could delay or reduce your payout.
If you’re staring up at a water stain or missing shingles, take a breath. Here’s how to turn a stressful situation into a successful insurance claim—while ensuring your home is restored with the quality and integrity you expect.
1. Assess Your Roof Damage and Decide if a Claim Is Worth It
Before you contact your insurer, it helps to take a step back and gauge exactly how bad the damage is—and whether filing a claim makes sense. A quick self‐inspection can reveal the extent of the harm and give you a ballpark for repair costs. Once you know what you’re up against, you can weigh out‐of‐pocket expenses, potential premium hikes, and the likelihood that your insurer will cover the loss. Below are four key steps to help you make that decision.
Inspect Visible Signs of Damage
Start by scanning your roof from ground level with binoculars, then carefully use a ladder to examine the edges. Look for:
- Shingles that are missing, cracked, curled, or blistered
- Granule deposits in gutters or downspouts
- Dents or dings on metal flashings, vents, and gutter guards
- Water stains, mold, or peeling paint on interior ceilings or attic rafters
Actionable tip: Photograph each issue you find—close‐ups of cracked shingles and wide shots of roof planes—to compare later and share with an adjuster.
Evaluate Repair Cost vs. Deductible and Premium Impact
Next, sketch out a rough estimate of repair costs:
- Get a ballpark figure from a local roofer or use online cost calculators.
- Compare that number to your insurance deductible.
If the repair estimate barely exceeds your deductible, you might pay more in higher premiums over time than you’d recover. RoofSimple offers a helpful risk/reward framework—when your out‐of‐pocket costs approach your deductible, fixing minor damage yourself often makes more sense than filing a claim. For their guidelines, check RoofSimple’s advice on when to file a roof claim.
Consider Roof Age and Policy Eligibility
Insurance companies tend to limit coverage on older roofs. If your shingles are 15–20 years old, you may find:
- Certain perils (wind, hail, algae) excluded altogether
- Payouts reduced due to depreciation or actual cash value (ACV) clauses
- Complete denial of coverage for “wear and tear”
Review your policy’s fine print for age‐related restrictions. If your roof has passed the insurer’s age threshold, a claim may trigger an ACV payment that leaves you footing the balance.
Document Preliminary Observations
Even at this early stage, keeping a simple damage log pays dividends:
- Note the date and approximate time the storm hit
- Record weather details—hail size, wind speeds, or heavy rains
- Jot down a brief description of each damaged area
- Save any vendor emails or text messages about your inspection
This initial documentation becomes Exhibit A for your claim packet and makes subsequent steps—like a professional inspection and insurer notification—much smoother.
2. Understand Your Homeowners Insurance Policy and Coverage Options
Your insurance policy is the roadmap for what will—and won’t—be covered when you file a roof replacement claim. Before you pick up the phone to notify your insurer, it’s crucial to decode four key elements: how your roof’s value is calculated, any coverage caps or exclusions, optional code‐upgrade protection, and the type of deductible you carry. A clear grasp of these policy components can mean the difference between a smooth payout and an unexpected out‐of‐pocket expense.
Replacement Cost Value (RCV) vs. Actual Cash Value (ACV)
Homeowners’ policies generally offer one of two valuation methods:
- Replacement Cost Value (RCV) covers the expense of installing a brand-new roof of similar materials and quality, minus your deductible. If your approved replacement estimate is $15,000 and your deductible is $1,000, you’d receive $14,000 up front, then the remaining depreciation once work starts.
- Actual Cash Value (ACV) factors in depreciation—age, wear, and tear—before applying your deductible. An older roof that’s already lost value might only net you $8,000 for that same $15,000 replacement.
In practice, ACV policies can leave significant gaps on roofs older than 10–15 years. Depreciation rates accelerate as shingles age, so a hail-damaged roof might qualify for only a fraction of the true replacement cost. Double-check your declarations page or ask your agent which valuation applies to your policy.
Policy Limits and Applicable Exclusions
Every policy sets a maximum payout, or “limit,” for covered losses. Typical homeowner limits range from $100,000 to $500,000 per structure, but roof damage may be subject to a separate sub‐limit. Beyond caps, you’ll want to scan for exclusions:
- Wear and tear / maintenance: Damage due solely to an aging roof or deferred upkeep is generally not covered.
- Roof age restrictions: Many insurers carve out roofs older than 15–20 years, paying only for sudden storm damage and excluding general wear.
- Excluded perils: Standard policies often omit floods, earthquakes, mold, or insects. Some riders also separate wind/hail deductibles, so hail damage might trigger a higher percentage deductible than a standard claim.
Reading the fine print on covered perils and sub‐limits will prevent surprises when adjusters tally up your losses.
Ordinance and Law Coverage for Code Upgrades
Building codes evolve over time, and a simple shingle replacement might run into unexpected hurdles if your existing roof deck or flashing doesn’t meet today’s standards. Ordinance and law coverage is an optional add-on that picks up the tab for:
- Tear-off and disposal of non-compliant materials
- Paying to rebuild or modify roof components to current code
- Permitting fees or structural reinforcements mandated by your municipality
If your roof sustains major damage, this coverage ensures that your new installation complies with the latest local regulations—without another bill landing at your door.
Deductible Types and Amounts
Your deductible is the portion you pay before insurance kicks in, and it can take two main forms:
- Flat-dollar deductible: A set amount (e.g., $1,000) subtracted from your claim settlement.
- Percentage-based deductible: Common for wind and hail claims, this is calculated as a percentage of your dwelling coverage (for example, 2% of a $300,000 dwelling limit equals a $6,000 deductible).
Higher deductibles translate into lower premiums but larger out‐of‐pocket costs after a storm. To learn more about how deductibles interact with replacement versus cash‐value payouts, see the Texas Department of Insurance’s guidance on deductibles and roof coverage.
3. Gather Detailed Documentation of Your Roof Damage
When it comes to insurance claims, what you don’t document can hurt your bottom line. A well‐organized, timestamped record of every dent, crack, and granule loss shows your insurer exactly why repairs or replacement are necessary. By collecting photos, logs, receipts, and expert tips up front, you’ll minimize back‐and‐forth with adjusters and lay the groundwork for a faster, fuller settlement.
Capture High-Resolution Photos and Videos
High‐quality visuals are the backbone of any claim. Follow these guidelines:
- Shoot wide‐angle photos that show full roof planes, then switch to close‐ups of damage.
- Photograph granule buildup in gutters, dents on vents or flashing, and interior leaks or stains.
- Record brief video walkthroughs, narrating each area of damage as you pan.
- Enable timestamps or geotags on your device—these embedded details help verify when and where the damage occurred.
Maintain a Damage Log and Communication Record
Images are powerful, but a written log provides context. Use a spreadsheet or notebook to track:
- Date and time you first noticed each issue
- Weather details—hail size, wind speeds, or driving rain—on the day of the event
- Brief description of the damage (e.g., “missing shingle on southwest slope”)
- Names, titles, and contact info for anyone you speak with, from roofers to insurance reps
Archive every email, text message, or voicemail related to your roof inspection. A clear chain of communication shows you acted promptly and can reduce disputes over timeliness.
Collect Repair Receipts and Temporary Fix Costs
Any emergency measures you take to prevent further damage—tarp installation, tree limb removal, or temporary flashing repairs—counts as valuable evidence. Keep:
- Invoices for tarping or shrink‐wrapping services
- Receipts for debris removal around gutters and eaves
- Bills for small, temporary fixes like plywood patches or sealant tubes
These line items demonstrate your commitment to mitigating harm and fulfill most policies’ “duty to mitigate” requirement.
Leverage Semper Fi Restoration’s Claim Documentation Tips
Our veteran‐led team at Semper Fi Restoration has refined documentation protocols through countless Colorado hail and storm claims. For insider advice on ideal photo angles, video walkthrough checklists, and naming conventions for your files, visit our insurance claims help guide. These proven techniques ensure your evidence is organized, persuasive, and ready to submit.
4. Use NOAA’s Historical Storm Data to Strengthen Your Claim
Insurance adjusters often want proof that a qualifying storm actually hit your neighborhood—and you can deliver it straight from the experts at NOAA. The National Oceanic and Atmospheric Administration maintains a searchable database of severe weather events, including hail, wind gusts, and flash floods. By pulling precise storm records for your county and date, you build an objective timeline that links your roof damage directly to a documented hailstorm or wind event—no guesswork required.
Access the NOAA Storm Events Database
Head over to the NOAA Storm Events Database and select your state, county, and the date range that covers the suspected damage. You’ll find filters for event type—choose “Hail” or “Thunderstorm Wind”—to narrow results. If you hit a snag, consult the NOAA FAQ for step-by-step tips on using the search interface and understanding report fields.
Interpret Location and Time-Specific Hail Event Data
Once you’ve pulled up the relevant event entries, focus on three key data points:
- Hail size(inches) to confirm the storm was severe enough to crack or knock loose shingles
- Event path or latitude/longitude coordinates showing where hail fell
- Begin and end times, which help tie the storm to your preliminary observation log
Keep in mind that older records may have a location accuracy of ±1 mile. If your home sits at the edge of a reported path, you can still make a solid case by combining this data with your own photo and video evidence.
Download and Attach Storm Event Summaries
NOAA lets you export or screenshot each event report—complete with maps, hail size charts, and wind gust tables. Save these files as PDFs or high-resolution images and label them clearly (for example, “Exhibit A – NOAA Hail Report 7/15/2024”). Embedding these summaries in your claim packet shows your insurer you’ve done your homework.
Correlate Weather Records with Your Damage Timeline
The final step is simple: line up the NOAA event dates and times with the entries in your damage log. If your notes show you first spotted missing shingles at dawn on July 16, and NOAA confirms a half-inch hailstorm struck your county just hours earlier, you’ve created a crystal-clear cause-and-effect narrative. This coordinated timeline gives adjusters confidence they’re covering legitimate storm damage—not preexisting wear or unrelated leaks.
5. Schedule a Professional Roof Inspection
Even if you’ve documented every dent and snapped dozens of photos, nothing replaces an expert’s eye when it comes to assessing storm damage. A professional inspection not only confirms what you’ve found—it often uncovers hidden issues beneath the shingles, on the underlayment, or around flashing. More than that, many insurers expect a contractor’s report before approving significant roof work. By bringing in a qualified roofer first, you’ll gain peace of mind, a detailed damage estimate, and a stronger foundation for your insurance claim.
Why Hire a Qualified Roofing Contractor First
Calling in a seasoned roofing professional early on delivers multiple advantages:
- You get an accurate damage assessment that takes into account structural integrity, underlayment tears, and potential water intrusion points.
- A contractor can prepare a comprehensive, itemized estimate, which insurance adjusters often require to validate repair costs.
- Experts will spot secondary issues —like compromised flashing or deteriorated decking—that might not be obvious from ground‐level photos.
- Having a contractor’s report in hand shows your insurer you’re proactive about preventing further damage, which satisfies most policies’ duty‐to‐mitigate clause.
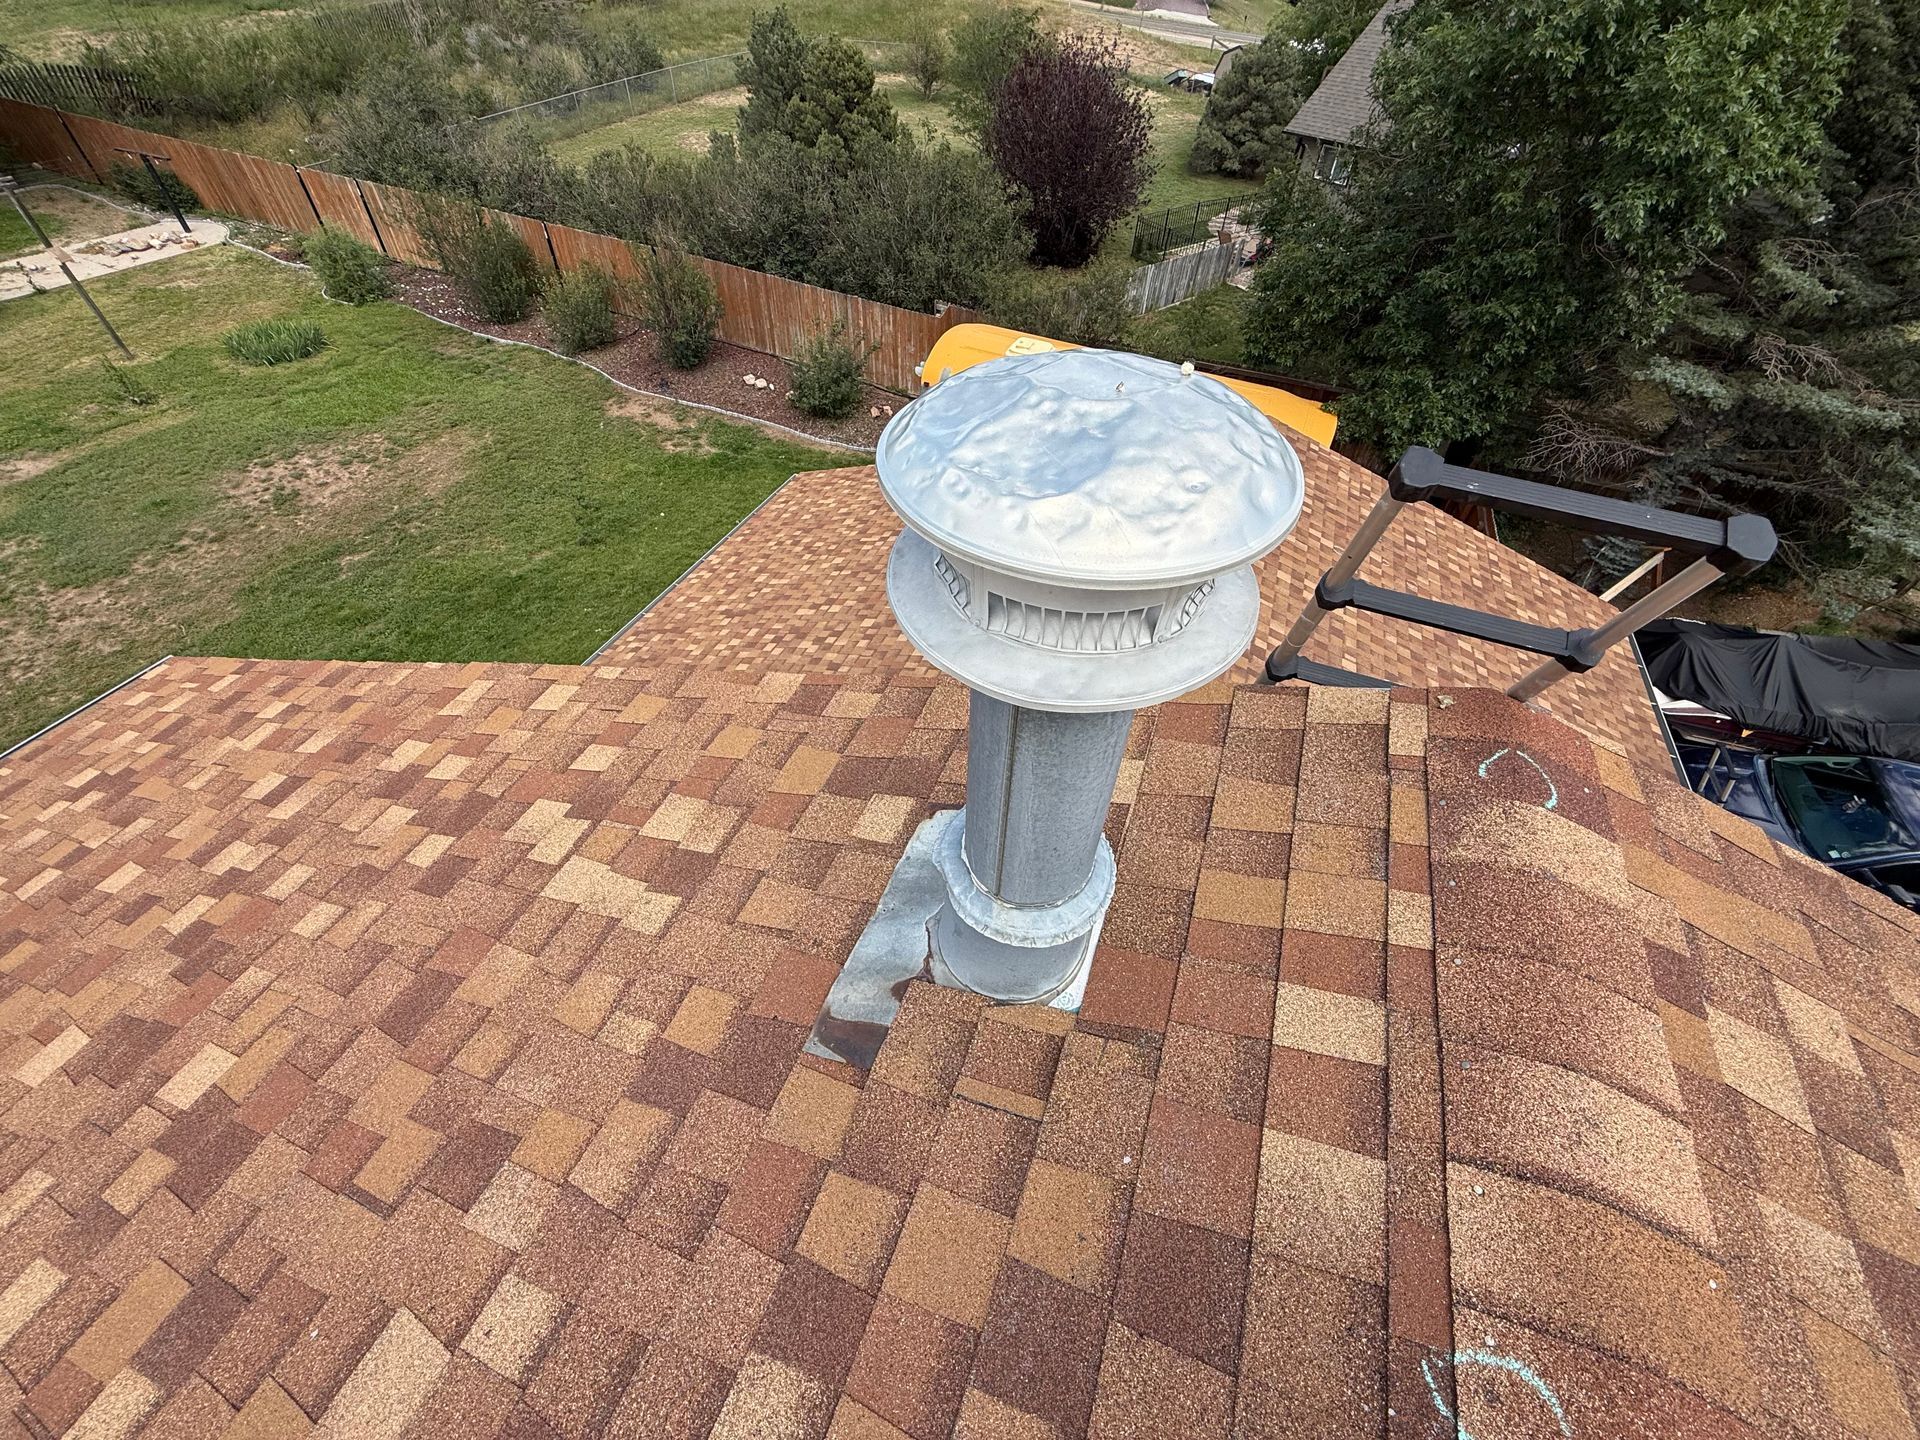
What to Expect During the Inspection
When your roofer arrives, here’s a quick rundown of how the evaluation unfolds:
- Walkaround and safety check: The inspector sets up proper fall protection and checks ladder stability before climbing.
- Structural overview: They’ll evaluate decking, sheathing, and gutters for granule buildup or warping.
- Material evaluation: Every shingle, vent cap, and piece of flashing is examined for bruises, cracks, or missing sections.
- Measurement and documentation: The contractor measures roof planes, photographs damage, and notes areas that need immediate attention.
- Detailed estimate: Within a few days, you’ll receive a line-by-line proposal covering labor, materials, permits, and any optional code-upgrade costs.
Qualities of a Reputable Inspector
Not all roofers are created equal. Before you sign up for an inspection, verify your contractor:
- Holds a current Colorado roofing license and carries liability and workers’ comp insurance.
- Has local references —reach out to neighbors or community groups for first-hand feedback.
- Demonstrates hail-damage expertise, ideally with before-and-after photos of previous storm claims.
- Maintains positive reviews on platforms like the BBB or Google, and answers questions about timelines, permits, and warranties with confidence.
Semper Fi Restoration’s Free Roof Assessment Offer
As a veteran-owned, Brighton-based company, Semper Fi Restoration brings military-grade precision and integrity to every inspection—and we do it at no cost to you. Our free roof assessment includes:
- A thorough on-roof evaluation by a certified estimator
- A full set of high-resolution photos, annotated for easy reference
- An itemized damage report you can share with adjusters or contractors
- Personalized advice on documenting and submitting your claim
To schedule your no-obligation inspection and tap into our proven claim documentation tips, visit our insurance claims help guide. Let us handle the heavy lifting so you can move forward with confidence.
6. Prepare and File Your Claim with Your Insurer
Once your roof damage is documented and you have a professional inspection report in hand, it’s time to formally notify your insurance company. A well‐organized claim packet—complete with photos, weather data, and contractor estimates—speeds up the review process and reduces back‐and‐forth. Follow these four steps to submit a complete, accurate roof replacement insurance claim.
Contacting Your Insurance Agent or Company
Begin by locating your policy number, agent’s name, and preferred method of contact. Many insurers offer multiple filing channels:
- Phone: Calling your agent or the company’s claims hotline can yield immediate guidance on next steps.
- Online portal: Log in to your policy dashboard to start a claim and upload digital attachments.
- Mobile app: Some carriers let you photograph damage and submit forms right from your smartphone.
Whichever route you choose, have these details ready:
- Policy number, dwelling coverage limit, and deductible amount
- Date and time of loss (as documented in your damage log)
- Contact information for your roofing contractor and any public adjusters or attorneys involved
Confirm how the insurer will acknowledge receipt—by email confirmation, text message, or mailed letter—so you have proof that your claim is officially open.
Completing Claim Forms Accurately
Insurance claim forms can look daunting, but a few best practices will keep errors to a minimum:
- Date/time of loss: Match your entry to the storm event’s start and end times from your NOAA or local weather report.
- Damage description: Use clear, concise language—“half-inch hail punctures on south slope shingles”—and refer to exhibit numbers for photos or PDF attachments.
- Cost estimates: Enter the line‐item totals from your roofer’s itemized bid, including materials, labor, and code-upgrade allowances.
- Attachments: Upload or attach your high‐resolution images, video walkthrough, damage log, professional inspection report, and any NOAA storm event summaries.
Before submitting, review each field for typos or missing information. Incomplete forms can trigger delays or requests for supplemental documentation.
Meeting Filing Deadlines
Insurance policies typically require you to report a covered loss “as soon as possible,” often within 365 days of the event. If you wait too long, your claim may be denied under the policy’s time‐limit clause. Beyond your insurer’s deadline, be aware of your state’s statute of limitations—usually between two and four years for property claims in Colorado. Filing promptly demonstrates good faith and preserves your right to compensation.
Tracking Your Claim Submission
After you hit “submit” or hang up with your agent, make sure your claim doesn’t vanish into the ether:
- Certified mail: If you send paper forms, use certified mail or another trackable service to confirm delivery.
- Portal receipts: Download and save any confirmation screens, emails, or reference numbers from online submissions.
- Screenshots: Capture in-app confirmation codes or date/time stamps on your phone.
- Email records: Archive every email exchange with your insurer—requests for information, claim status updates, and final settlement offers.
By keeping a complete audit trail, you’ll be ready to follow up if the adjuster’s office needs reminders or if you need to escalate a stalled claim.
7. Help the Insurance Adjuster Inspect Your Roof
When the insurance adjuster arrives, it’s your chance to ensure every damaged area gets proper attention. A collaborative, well-prepared inspection can speed up your claim and reduce the chance of overlooked issues. Here’s how to make the most of that onsite visit.
Be Present and Prepared
Plan ahead by scheduling the inspection at a time you can attend—early mornings often work best before afternoon winds pick up. Clear gutters of debris, remove obstacles from around the home, and unlock any gated areas so the adjuster can access all sides of your roof. Have your damage log, photo catalog, NOAA storm report, and contractor estimate on hand—either in printed form or on a tablet. Being organized from the start shows you’re serious about documenting storm damage.
Highlight Key Damage Areas
Guide the adjuster directly to the most obvious signs of harm: half-inch hail dents on vents, cracked or missing shingles, granule accumulation in gutters, and any interior stains or sagging drywall. Compare these spots to your own photos (e.g., “This is Exhibit 3—granule loss on the northeast slope”). If you’ve marked up aerial drone shots or roof diagrams, share those as well. Pointing out underlayment tears or compromised flashing can uncover hidden problems you might miss from ground level.
What Not to Say to the Adjuster
Keep your comments strictly factual and avoid admitting any preexisting deficiencies. Phrases like “I knew this roof was old” or “I never maintained it” can give the insurer ammunition to reduce your payout. Instead, stick to describing the storm and the damage you observed. For guidance on framing your conversation, see Carrigan & Anderson’s tips on what not to say to a home insurance adjuster.
Confirm Adjuster’s Notes and Next Steps
Before the adjuster leaves, ask for a copy of their field report or take clear photos of their written notes. Note any follow-up actions an insurance rep mentioned—like requiring a supplement for code upgrades or waiting on a second inspection. Get estimated timelines for when you can expect the first payment. Having this information documented ensures you can track progress and prompt the insurer if your claim stalls.
8. Review, Negotiate, and Accept the Claim Settlement
Once your insurer sends a settlement offer, take a deep breath—and then roll up your sleeves. This step is all about understanding the numbers on the page, pushing back where necessary, and ultimately signing off on a payout that covers your roof’s full restoration. Skipping a close review can leave gaps in coverage or unexpected out‐of‐pocket costs, so treat this stage like a final exam: study every line, ask questions, and don’t be afraid to negotiate.
Decoding Your Settlement Offer
Assessing the first check can feel like deciphering a foreign language. The main components to watch for are:
- Actual Cash Value (ACV) vs. Replacement Cost Value (RCV): If your policy covers depreciation, the insurer will issue an ACV check (replacement cost minus depreciation, then minus your deductible). A second check—called “recoverable depreciation”—arrives once you’ve started repairs and handed in invoices.
- Line‐item breakdown: Your adjuster should list materials and labor in detail. Compare each entry to your contractor’s estimate. If something’s missing—say, code-upgrade fees or underlayment replacement—highlight that gap.
- Partial vs. final payment: The initial payment often covers basic recovery. Expect a smaller up‐front check, then a final disbursement when work begins and you submit proof of payment for the first draw.
Take out a highlighter and match each insurer figure against your roofer’s bid. If the numbers don’t line up, prepare to negotiate.
Negotiation Strategies
Insurance offers are negotiable, especially on complex roof jobs. To tip the scales in your favor:
- Supply supplementary estimates: If your original report missed decking repairs or warranty upgrades, get an updated bid and send it in with a cover letter detailing why it’s necessary.
- Submit new evidence: Perhaps you uncovered additional damage during tear-off. Photos, extra inspector notes, or a supplemental NOAA hail report can strengthen your case.
- Request a re-inspection: Adjusters aren’t infallible. It’s reasonable to ask them back if you believe they undervalued certain items.
- Quote policy language: Pointing out specific covered-peril clauses or code-upgrade endorsements can remind your insurer of what they owe.
Keep correspondence professional and document every email or phone call. Persistence often pays off—insurers want to close claims, but they’ll only settle for the full scope if you push gently but firmly.
When to Involve a Public Adjuster or Attorney
Most straightforward claims you can handle yourself, but sometimes you hit a brick wall:
- Large discrepancies: If the insurer’s offer is thousands short of your documented estimate, a public adjuster can re-evaluate damage on your behalf. They typically charge a percentage of the final settlement, so weigh that cost against the extra funds they might recover.
- Unfair denials: If your insurer denies coverage for a clear hail event or misapplies an exclusion, it may be time to get legal counsel. A roof-savvy attorney can interpret complex policy language and negotiate or litigate on your behalf.
- Complex code issues: When city requirements or ordinance upgrades add significant expense, a specialist can argue that those costs are indeed part of your policy protections.
Bringing in outside pros adds expense, but when large sums are on the table or coverage interpretations clash, it’s often worth the investment.
Finalizing Your Approval
After negotiations, you’ll receive a revised settlement packet. Before you sign on the dotted line:
- Review the scope of work: Make sure every necessary repair—flashing, decking, code fees—is spelled out in your final adjuster worksheet.
- Confirm check amounts: Match the total with your final contractor invoice plus recoverable depreciation.
- Understand the draw schedule: Some insurers issue multiple progress payments. Know exactly what proof you need to submit at each stage.
- Schedule the work: Once signed, give the green light to your roofing partner. Lock in start dates and payment due dates so your contractor can order materials and crew.
When everything lines up, sign the release, endorse the checks as instructed, and get ready to watch your new roof go up. At this point, your claim is closed—and your home is on track for a top-to-bottom restoration backed by the promise of quality and integrity you deserve.
9. Engage a Trusted Contractor and Finalize Roof Replacement
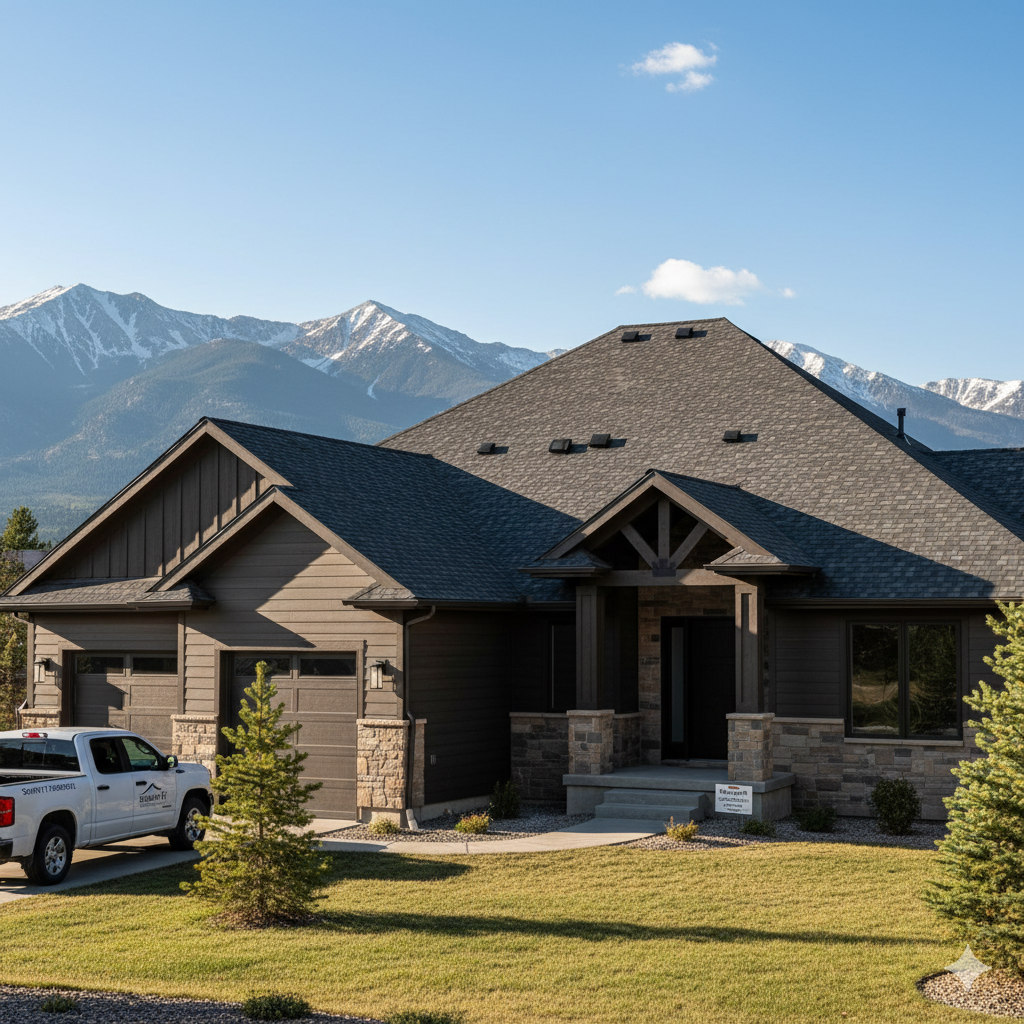
Once your claim is approved, it’s time to move from paperwork to practical action: installing your new roof. Partnering with the right contractor not only ensures a quality installation, but it also keeps your project on schedule, on budget, and compliant with insurance requirements. Below are four critical steps to engage a reputable roofing team—ideally one that shares Semper Fi Restoration’s military‐inspired values of integrity, quality, and efficiency.
Choosing the Right Roofing Partner
Selecting a contractor isn’t just about the lowest bid. Look for a company that:
- Holds the proper Colorado roofing license and insurance, and can provide certificates on demand.
- Demonstrates a track record of timely project delivery and stellar workmanship, backed by local references and online reviews.
- Is veteran‐owned or honors military values—Semper Fi Restoration, for example, brings Marine-level discipline and attention to detail to every job.
- Communicates clearly about materials, warranties, and any potential code‐upgrade expenses.
A trustworthy roofer will walk you through their process, answer questions openly, and provide a written estimate that mirrors your approved insurance scope.
Reviewing and Signing the Repair Contract
Before any shingles go up, your contractor should provide a detailed contract that outlines:
- Scope of work: Exact tasks—tear‐off, decking repairs, flashing installation, shingle type, and any ordinance‐compliance upgrades.
- Materials and brands: Shingle manufacturer, underlayment, fasteners, and ventilation products, plus warranty terms.
- Timeline and milestones: Start date, expected completion, and steps for handling weather delays.
- Payment schedule: Deposit amount, progress payments, and final draw, tied to specific project phases.
Read every line, confirm that the contract mirrors your insurance settlement, and ask for clarifications in writing before putting pen to paper.
Managing Payments and Deductibles
Coordinating cash flow between your insurer, your wallet, and your contractor requires organization:
- Pay your deductible directly to the contractor at kickoff, as stipulated by your insurance carrier.
- Endorse insurance checks promptly—first for Actual Cash Value (ACV) and later for recoverable depreciation—so your roofer can order materials without delay.
- Keep copies of all payment receipts and check stubs; these documents may be required to trigger the final depreciation release.
- Confirm whether your insurer requires lien waivers or contractor affidavits before issuing additional funds.
Handling these financial details up front prevents mid‐project surprises and ensures your roofer can maintain momentum.
Overseeing Project Completion
Your roof is a major investment; a final walkthrough guarantees that nothing is overlooked:
- Conduct periodic site visits or request daily progress photos to watch for quality workmanship and adherence to plans.
- Use a punch-list—ideally provided by your contractor—to track finish items such as fascia trim, gutter alignment, and clean‐up of nail debris.
- Inspect attic spaces post‐installation to confirm proper ventilation, insulation integrity, and absence of daylight intrusion.
- Sign off only once every checklist item is checked, warranties are documented, and you’ve received manufacturer guarantees for shingles and underlayment.
A thorough final inspection locks in the value of your insurance claim and leaves you with a high‐performance roof built to protect your home for decades.
10. Track Deadlines and Resolve Disputes if Needed
Even after you’ve signed off on your settlement and your new roof is underway, staying on top of key deadlines and knowing how to push back if something goes wrong will protect both your home and your wallet. Whether it’s filing an appeal, meeting contract milestones, or enforcing warranty coverage, a proactive approach keeps your project on track and prevents small issues from turning into costly headaches. Below, we’ll walk through how to monitor critical dates, engage Colorado’s insurance regulators when necessary, and escalate disputes to reach a fair resolution.
Monitoring Claim and Repair Timelines
Once your claim is approved, compile a simple calendar of all relevant dates:
- Claim appeals window: Most insurers allow 30–60 days from the settlement date to file an appeal.
- Contract milestones: Note your contractor’s start date, progress checkpoints, and final completion deadline.
- Warranty periods: Record both the manufacturer’s shingle warranty and your roofer’s workmanship guarantee.
Set reminders in your phone or email so you can submit supplemental documentation, request re-inspections, or jump on any missed deadlines before they slip by. If a contractor falls behind, this log also gives you leverage to enforce penalties or withhold final payment until work meets the agreed standard.
Colorado Division of Insurance Complaint Process
If you’re running into roadblocks with your insurer—slow responses, denial of covered damage, or unexplained claim reductions—you have the right to seek outside help. The Colorado Division of Insurance (DOI) oversees consumer complaints and can step in when companies fail to honor policy terms. To file, visit the DOI portal at https://doi.colorado.gov/for-consumers/file-a-complaint, complete the online complaint form, and attach supporting documents. Submitting a well‐organized complaint often prompts the insurer to re‐evaluate your claim rather than risk regulatory scrutiny.
What Information to Include in Your Complaint
A concise, evidence-backed complaint speeds up the review process. Be sure to provide:
- Your policy number, claim number, and date of loss
- A timeline of events, including when you filed the claim and any follow-up calls or emails
- Copies of inspection reports, high-resolution photos, and NOAA storm data excerpts
- The settlement offer or denial letter, with notes on disputed line items
- Any contractor estimates that the insurer ignored or undervalued
Organized attachments—clearly labeled and chronologically ordered—help the DOI see exactly where the insurer may have violated policy terms or state regulations.
Follow-Up and Escalation Paths
After you submit a complaint, the DOI typically acknowledges your case within a few business days and assigns an analyst. You can check your complaint status online or by calling the DOI consumer hotline. If mediation through the DOI doesn’t resolve the issue, you may consider:
- Engaging a public adjuster to re-inspect and document additional damage on your behalf
- Consulting an attorney experienced in insurance law to explore bad-faith claim litigation
- Requesting arbitration, if your policy includes a binding‐arbitration clause that’s faster and less costly than court
By knowing your rights and following each step carefully, you’ll be positioned to tackle any dispute head-on—and ensure your new roof is backed by the coverage you paid for.
11. Understand Post-Claim Impacts and Long-Term Maintenance
Your roof replacement mark may be behind you, but the story doesn’t end when the last shingle is installed. Knowing how a roof replacement claim can affect your insurance profile—and staying on top of routine upkeep—helps protect your investment long after the checks clear.
Potential Effect on Your Insurance Premium
Filing a roof replacement claim can change how insurers view your property’s risk. A single documented hail event may be considered an isolated incident, and some carriers even offer deductible forgiveness programs for first-time hail or wind claims. However, multiple claims within a short period typically signal higher risk, which can translate into premium increases at renewal time. In Colorado, homeowners often see rates adjust by roughly 5–15% after a significant roof claim, though the exact impact depends on your insurer’s underwriting guidelines, your claims history, and any state-level rate restrictions.
Implementing Preventive Maintenance
Preventive care is your best defense against future damage—and rising insurance costs. Set up a simple annual schedule that includes:
- A professional roof inspection to catch loose or damaged shingles early
- Gutter cleaning in spring and fall to prevent water backup and ice dams
- Regular tree-trimming around overhanging branches to reduce impact risk
- Checking attic ventilation and insulation to avoid moisture buildup
Consistent maintenance not only extends your roof’s lifespan but also shows insurers you’re proactive, which can mitigate premium hikes at policy renewal.
Documenting Future Roof Work
Keeping a meticulous home improvement file pays off if you ever need to file another claim or renegotiate coverage. After each service call or upgrade, store:
- Detailed invoices listing materials, labor, and date of service
- Before-and-after photos, especially if any storm-related work was involved
- Manufacturer warranties and workmanship guarantees
- Permits and code compliance records for any major alterations
A well-organized record demonstrates to insurers—and potential buyers in the future—that your roof has been cared for responsibly.
Staying Informed on Policy Updates
Insurance products evolve, and so do local building codes. Make it a habit to review your coverage before each renewal. Check for changes in:
- Deductible options (flat-dollar vs. percentage-based) and how they affect your out-of-pocket exposure
- Policy limits for roof and exterior coverage, including any sub-limits on hail or wind damage
- Optional endorsements like ordinance and law protection or algae-resistant shingles
- Exclusions that could be added or removed, especially around roof age or material type
By staying informed—and adjusting deductibles or limits as your roof ages—you’ll maintain the right balance of protection and cost, ensuring your home stays safe and your premiums stay competitive.
Next Steps for Your New Roof
By now, you’ve navigated the inspection, documentation, and claim process—and you’re on the brink of a brand-new roof backed by your insurer’s support. Remember, thorough preparation and clear records aren’t just for the claim; they set the tone for every future repair, warranty issue, or insurance renewal. Keep your inspection photos, contractor estimates, and permit paperwork organized so any future hailstorm or wind event can be addressed quickly and confidently.
Moving forward, stay proactive with routine maintenance: schedule annual roof check-ups, clear your gutters, and trim overhanging branches. These simple steps extend the life of your investment and demonstrate to insurers that your property is well cared for—helping to keep premiums in check. And whenever you have questions about coverage, deductibles, or required upgrades, lean on a trusted partner who knows Colorado weather and insurance inside and out.
Ready to lock in your roof’s performance and protect your home against whatever the next storm brings? Visit the Semper Fi Restoration homepage to schedule your free roof assessment and insurance claim assistance. Our veteran-led team is standing by to guide you through every phase—from final paperwork to the last shingle—so you can enjoy peace of mind under a roof built on integrity, quality, and valor.
The body content of your post goes here. To edit this text, click on it and delete this default text and start typing your own or paste your own from a different source.
We'd love to do a complimentary roofing assessment for you!