Hail Damage Siding Repair: How To Spot, Assess, And Fix It
Josh Bosley • June 6, 2025
Every year, storms across Colorado’s Front Range unleash millions of dollars in property damage—hailstones pummel rooftops, batter vehicles, and leave siding riddled with cracks, dents, and bruises. For homeowners in the Denver and Northern Colorado areas, these storms aren’t a rare inconvenience—they’re a recurring threat that can silently undermine a home’s protection, curb appeal, and even its structural integrity. Siding that looks only mildly scuffed on the surface might be hiding deep fractures, water pathways, or the first signs of rot. Left unaddressed, these vulnerabilities can spiral into costly repairs, mold growth, or higher energy bills.
That’s why knowing how to spot, document, and address hail damage to your siding isn’t just “good practice”—it’s an essential part of safeguarding your most important investment. In the following sections, you’ll learn how to recognize the telltale signs of hail impact on different siding materials, inspect your home safely and thoroughly, weigh your repair or replacement options, and navigate insurance claims with confidence. Whether you’re considering a quick DIY fix or exploring more resilient siding upgrades, this guide will walk you step-by-step through the process—helping you act quickly, avoid common pitfalls, and restore your home’s exterior with lasting peace of mind.
Step 1: Understand How Hail Impacts Siding Materials
Hail isn’t just frozen rain—it’s a high-speed projectile that can strike your home with surprising force. When a hailstone whirls through the atmosphere and slams into exterior surfaces, its mass (
m
) and velocity (
v
) generate kinetic energy (
½mv²
) that’s transferred directly to your siding. In practical terms, a larger stone or faster wind carries exponentially more force, turning what might look like a mild dent into a crack, chip, or worse.
Siding materials react differently under this barrage. Some simply dent, while others fracture or split, opening pathways for water intrusion and rot. Before you can assess or repair hail damage, it helps to know the strengths and weaknesses of each siding type, how stone size and speed play a role, and why eastern Colorado sees more hail reports than almost anywhere else.
Types of Siding and Their Vulnerabilities
- Vinyl: Lightweight and flexible, vinyl often displays dents or “silvering” (a chalky, discolored halo) around the impact point. Sharp hail can even crack or chip panels, leaving small holes that trap moisture.
- Aluminum: Thin metal panels excel at shedding rain but dent easily under hail. Impacts often leave rounded depressions and chipped paint, which can rust if left unsealed.
- Wood: Natural wood siding can split along grain lines and warp when struck repeatedly. Even minor cracks allow water absorption, leading to rot and mold in the weeks after a storm.
- Fiber Cement: Made from sand, cement, and cellulose fibers, this material resists rot and fire but can chip or fracture at edges under hard hits. Once the tough outer coating is breached, water can seep into the core.
- Engineered Wood: Combining plywood with resin-coated wood fibers, engineered siding holds up better than pure wood—yet large hail can still fracture the outer layer, causing delamination or swelling if moisture follows the cracks.
How Hail Size and Velocity Affect Damage
The energy behind a hailstone is tied to both its weight (which grows with diameter) and its fall speed (enhanced by wind). In common terms:
- Pea-size (⅜″) stones may leave tiny pinpricks or micro-fractures—almost invisible unless you know where to look.
- Nickel-size (⅝″) hail can ding vinyl or wood siding, creating surface depressions that catch dirt and water.
- Quarter-size (1″) stones typically punch dime-sized dents, especially on aluminum or vinyl.
- Golf-ball (1.75″) and larger hail can crack fiber cement at corners, split wood boards, or even dent steel doors—and that’s when serious leaks start.
Every jump in hail diameter multiplies the impact energy, so what feels like minor dings at first glance can signal deeper, speed-driven damage.
Local Hail Climatology and Reporting Biases
Colorado’s Front Range ranks among the nation’s most hail-prone regions, thanks to the collision of humid plains air with mountain updrafts. Urban corridors like Denver see more reported events simply because there are more roofs, vehicles, and people to witness every storm. A classic example of “reference-object bias” appears in an NOAA study, which shows how reports spike where obvious damage anchors attention.
Understanding these local patterns means you’ll recognize that even small hail can pose a risk—especially when storms frequently revisit the same neighborhoods. When you know how often and how hard hail hits your area, you’ll be better prepared to spot subtle damage before it becomes an expensive problem.
Step 2: Check for Safety and Prepare for Inspection
Before you start poking around your roofline or leaning against the house, it’s crucial to put safety first. A single slip on a wet ladder or an unexpected gust of wind can turn an inspection into a serious accident. In this section, we'll outline how to gear up properly, evaluate whether you should tackle the check yourself, and when it's wiser to call in the pros.
Ensuring Personal Safety Before Climbing Ladders
When climbing a ladder, take a moment to inspect both the ladder and the ground beneath it. Make sure the ladder’s feet are on firm, level terrain and that its rungs are clean and intact. Avoid setting up on soft or uneven patches—stones, mulch, and even thick grass can shift under weight.
Choose non-slip footwear with good ankle support, and consider wearing a hard hat in case of falling debris. Gloves will improve your grip on rails and side rails. Never attempt a siding inspection during or immediately after a storm: wet surfaces and gusty conditions dramatically raise the risk of a fall.
Finally, maintain three points of contact—two hands and one foot or two feet and one hand—whenever you’re on the ladder. If you feel unsteady, step down, reassess, or call a professional to handle the job.
Gathering Protective Gear and Tools
A safe inspection requires more than just a ladder. Safety glasses protect your eyes from flying particles when you’re examining dents up close. Sturdy work gloves guard against sharp edges on cracked siding, and a tape measure or chalk can help you note the size and location of damage.
A fully charged smartphone or digital camera will serve as your photo log, capturing wide shots and close-ups for insurance claims. For a deeper check on moisture, consider a handheld moisture meter—it can reveal hidden leaks behind the siding before they turn into mold.
Organize these tools in a lightweight carry bag or tool belt, so everything you need stays within reach. Having the right gear at hand speeds up the process and reduces the temptation to overextend yourself.
Scheduling a Professional Inspection When Needed
Not all homes are safe to tackle solo. If your house is more than two stories tall, has steep slopes, or shows widespread damage, it’s time to call in a specialist. Licensed experts with storm-damage experience—such as those at VIS Exterior—have the training, equipment, and insurance to perform a thorough inspection without putting you at risk.
A professional assessment may cost several hundred dollars, but compare that to the hidden repair bills you could incur from a missed fracture or unseen water intrusion. In most cases, expert eyes will uncover underlying issues you’d never spot from ground level, and their detailed report will be invaluable when navigating insurance claims.
Step 3: Conduct a Thorough Post-Storm Siding Inspection
Once you’ve got your gear and a secure ladder, it’s time for a systematic check of every wall panel. Start at ground level and walk the full perimeter of your home, scanning the siding from eye height to the eaves. Move incrementally—step back for a broad view, then come closer to spot smaller flaws. A second pass with binoculars or a zoom lens on your phone can catch damage you missed in person. The goal is to leave no board unexamined, whether it’s vinyl, wood, fiber cement, or metal.
Spotting Visible Signs: Dents, Cracks, Holes
The most obvious evidence of hail is surface damage:
- Dents on vinyl and aluminum appear as rounded depressions, often with flared edges.
- Cracks or splits in wood and engineered panels follow grain lines, sometimes extending several inches.
- Punctures in fiber cement look like tiny chips or fragments missing at corners.
- Paint chips on metal siding expose raw substrate, signaling corrosion risk.
Make a note of each defect’s size and location—it’ll guide both repair strategy and insurance documentation.
Using Lighting and Angles to Reveal Damage
Natural light can be your best ally. Inspect in early morning or late afternoon, when low-angle sunlight casts long shadows across dents and scratches. If timing doesn’t align with your schedule, a flashlight held at a sharp angle will do the trick even in full daylight.
For an extra check, gently spray each wall with a garden hose. A thin film of water pools in indentations, making them stand out. This simple trick, recommended in Angi’s guide on dealing with storm-damaged siding, will help you identify spots you might otherwise overlook.
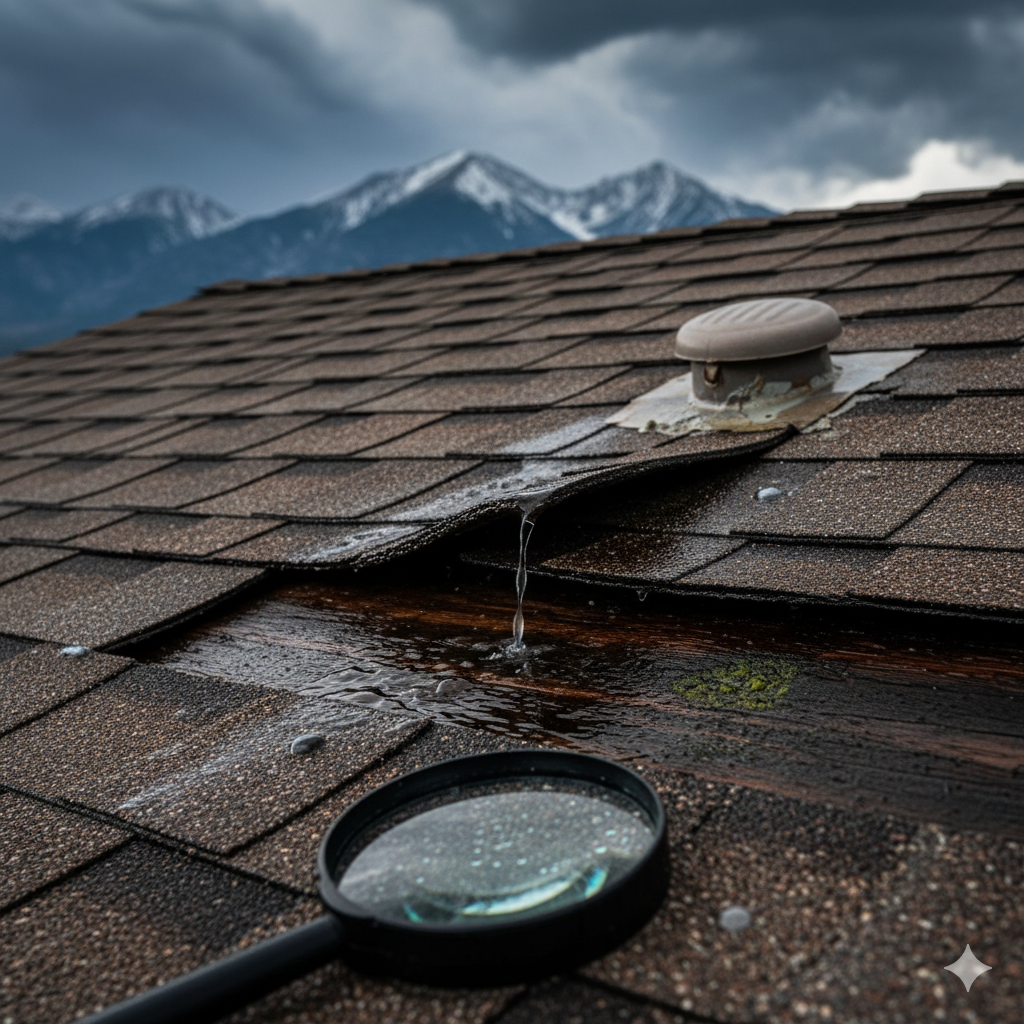
Recognizing Hidden Damage Beneath the Surface
Not all hail damage shows up as obvious punctures. Vinyl panels sometimes develop “silvering,” a chalky residue in the grooves that hints at micro-fractures below the surface. You might also feel subtle give around impact points, indicating the material’s integrity has been compromised.
Get close enough to inspect seams and panel edges. Surface fractures often radiate from these pressure points, signalling that moisture could migrate behind the siding. For more thorough diagnostics, professionals use moisture meters and thermal imaging to detect leaks before they lead to rot.
Inspecting Adjacent Components for Indirect Damage
Hail seldom strikes only one element. Check gutters and downspouts for dents or dings that mirror the size and frequency of siding impacts. Examine window frames, trim boards, and corner posts—damage here often correlates directly with what your siding endured.
A battered gutter or cracked trim tells you the hail was heavy enough that the siding probably suffered similar blows. Treat these indirect signs as red flags and include them in your inspection notes and photo log.
When to Call a Professional for an Expert Inspection
If during your walkthrough you spot mold, warped boards, or interior water stains, it’s time to bring in a specialist. Licensed siding inspectors know exactly where hidden voids and leaks can hide, and their detailed reports can strengthen insurance claims.
Firms like Dr. Exteriors offer comprehensive assessments with moisture testing and structural checks. When the damage is widespread or your home is more than two stories tall, partnering with a pro not only protects your investment—it keeps you safe.
Step 4: Assess the Severity and Decide Repair vs. Replacement
Not all hail damage calls for a full siding overhaul—sometimes a targeted patch job will do the trick. Other times, the dents, cracks, and punctures signal a deeper problem that only a complete replacement can solve. In this step, you’ll learn how to distinguish between minor and major damage, understand why putting off repairs can cost you more down the road, and run the numbers on repair versus replacement so you can make an informed choice.
Criteria for Minor vs. Major Damage
Minor damage often shows up as isolated blemishes on a few panels:
- Small dents or shallow depressions (less than 1″ across)
- Hairline cracks or surface “silvering” on vinyl
- A handful of chipped paint spots on aluminum
Major damage means the protective barrier is compromised across multiple areas:
- Widespread cracking, splitting, or punctures in panels
- Water staining or sagging boards indicating leaks
- Warping or bulging that suggests the siding has absorbed moisture
When more than 20% of a wall face shows these issues—or if you spot signs of water infiltration behind the boards—it’s time to think beyond a simple patch. As Seidel Exterior Group notes, major hail events can fracture fiber cement or engineered wood at multiple impact points, creating pathways for mold and rot.
Long-Term Risks of Delaying Repairs
A few ignored dents might seem harmless, but any break in the siding lets water in. Left unchecked, moisture can seep into sheathing and framing, leading to:
- Mold and mildew growth that affects indoor air quality
- Structural decay in wood or engineered materials
- Higher heating and cooling costs as insulation loses effectiveness
Insurance policies often set strict reporting windows; missing your deadline can leave you footing the entire bill. Even if you aren’t filing a claim, a stitch-in-time approach prevents small drywall stains from morphing into demolition-level damage.
Calculating Repair vs. Replacement Costs and ROI
Cost estimates vary by material and region, but here’s a rough breakdown for Colorado homeowners:
- DIY patch kits for vinyl dents or small cracks: $50–$150 in materials
- Professional panel repairs (vinyl, aluminum): $200–$800 per incident
- Partial replacement of multiple panels: $1,000–$3,000
- Full siding replacement (2,000 ft² home): $8,000–$15,000
On top of direct costs, consider long-term value. The National Association of Realtors reports that siding replacements recoup around 75% of their cost at resale—higher than many other exterior upgrades. If your home is nearing sale or you plan to stay put for decades, a new, impact-resistant product could pay off in energy savings, curb appeal, and peace of mind.
By matching the scope of damage with these criteria and figures, you’ll be ready to choose the path—repair or replace—that best protects your home and your budget.
Step 5: Document Damage for Insurance and Estimates
When hail rakes your siding, what you see is only the beginning. Proper documentation turns scattered dents and cracks into a clear, persuasive story for your insurer and contractors. A methodical record—packed with photos, notes, and reports—will speed up your claim and help you compare repair bids side by side.
Photographing and Cataloging All Damaged Areas
Grab your camera or smartphone and walk the full perimeter of your home. For each wall, take:
- A wide shot that shows context (e.g., the north elevation, garage side).
- Close-ups of individual impacts, each with a ruler, coin, or tape measure for scale.
- Alternate angles and lighting—morning or evening sun, or a flashlight at a low angle—to highlight subtle depressions.
Label every image immediately: “East wall, second panel down, 6/14/2025.” Group photos by side and date in folders on your device. That way, when an adjuster asks for “panel-level evidence,” you’ll have a neatly organized catalog ready to upload or print.
Using Detailed Inspection Reports to Support Claims
Beyond photos, a written inspection report adds weight to your case. If you’ve hired a third-party inspector or siding specialist, request a signed document that describes:
- Exact locations and sizes of damage (e.g., “nickel-size dent on vinyl panel row 3”).
- Material conditions (such as “silvering around hail points” or “fiber cement edge chips”).
- Any signs of moisture intrusion, rot, or hidden fractures.
Align those narratives with your photos. When descriptions and images match, insurers and contractors can zero in on the same trouble spots—reducing confusion and back-and-forth.
Keeping Records of Estimates and Repair Plans
Once you start gathering bids, treat every estimate like a critical piece of evidence. Create a digital folder (and a physical binder) for:
- Date-stamped contractor estimates, each clearly stating labor, materials, and warranty details.
- Copies of emails and texts—especially any promise of free inspections or discount offers.
- Receipts for out-of-pocket expenses (moisture meters, repair kits, safety gear).
Store everything chronologically, and back it up in the cloud. For guidance on how much to annotate and save, check the Colorado Department of Insurance FAQs. When insurance adjusters see your thorough folder, your claim moves forward smoothly—and you’ll have all the info you need to compare final costs against initial projections.
Step 6: Initiate and Navigate the Insurance Claims Process
Dealing with insurance after a hailstorm can feel like wading through paperwork—but a clear, methodical approach will pay off. Start by understanding exactly what your policy covers, then file your claim promptly and present organized documentation. Finally, be prepared to negotiate with adjusters and understand how deductibles affect your out-of-pocket costs. Here’s how to keep the process on track:
Reviewing Your Homeowner’s Insurance Coverage
Before you pick up the phone, pull out your declarations page and read the fine print on hail and wind coverage. Policies often include:
- Dwelling coverage limits: The maximum the insurer will pay to repair or replace structural damage.
- Wind/hail deductible: Some companies impose a separate percentage deductible for hail or wind events—sometimes 1–5% of the dwelling limit.
- Coverage exclusions or endorsements: You may have optional hail riders that expand or restrict your protection.
- Timeframe for filing: Many policies require notice of loss within 30 to 60 days of the date of damage.
If you’re unsure about any terms, contact your agent or refer to the Colorado Department of Insurance FAQs for guidance on common provisions and deadlines.
Filing a Timely Claim and Avoiding Common Pitfalls
Once you’ve confirmed what’s covered, it’s time to open your claim:
- Notify your insurer immediately—even if you don’t have all the details. Early notice protects your rights and meets policy deadlines.
- Submit your photo catalog and inspection report to back up your claim. Organized documentation speeds up the adjuster’s review.
- Avoid volunteer repairs until after your adjuster’s visit—permanent fixes can complicate damage assessments.
- Keep communications written when possible. Follow up phone calls with a brief email summarizing what was discussed.
Don’t let an adjuster pressure you into a quick, lowball settlement. If you suspect your initial offer is too low, you have the right to challenge it with evidence and third-party estimates.
Negotiating Settlements and Understanding Deductibles
Adjusters will present an initial estimate based on their inspection. To ensure you’re getting a fair settlement:
- Request an itemized breakdown of labor, materials, overhead, and profit.
- Ask questions about line items that seem low—like pay rates or siding removal costs.
- Provide your contractor’s estimates if they exceed the insurer’s figures.
- Know your deductible: If you have a 2% hail deductible on a $400,000 dwelling limit, expect to pay up to $8,000 before insurance kicks in.
Remember that some policies pay out on an actual cash value (ACV) basis—minus depreciation—while others cover replacement cost (RCV) once repairs are complete. Clarify which applies to your claim, so you’re not surprised by a depreciation holdback. A well-organized claim file and knowing your policy’s structure will give you confidence when negotiating—helping you secure the funds needed to restore your siding fully.
Step 7: Select and Vet a Professional Siding Repair Contractor
When hail leaves your home with more than a few dings, bringing in a qualified contractor is the safest way to restore both function and curb appeal. But not all siding companies are created equal—especially after a big storm, when “storm chasers” and unlicensed handymen flood neighborhoods with lowball offers. To protect your investment and avoid headaches down the road, take the time to verify credentials, ask targeted questions, and watch out for red flags before signing any contract.
Checking Contractor Licensing and Insurance
A reputable contractor will carry the necessary state licensing, bonding, and insurance to work on your property. In Colorado, you can verify their license through the Division of Professions and Occupations (dpo.colorado.gov). Look for a residential contractor or general contractor license and confirm it’s active and in good standing.
Next, request proof of insurance. You want both general liability coverage—to protect you if someone damages your landscaping or causes accidental harm—and workers’ compensation, which covers any injuries the crew might suffer on your property. Get certificates naming you as an additional insured, and call the insurer directly if you have any doubts about coverage dates or limits.
Asking the Right Questions and Verifying References
Once licensing and insurance check out, dive into the contractor’s track record. Ask for examples of hail-damage siding repairs they’ve completed in your area—ideally projects similar in scope and material to yours. A seasoned pro should readily share before-and-after photos and the names of satisfied customers.
Follow up by calling or emailing those references. Ask whether the work was finished on time, if materials matched their estimate, and how the crew handled cleanup. Then head online: browse Google Reviews, Yelp, and the Better Business Bureau for patterns—both compliments and complaints. A handful of minor issues is normal; a long list of unresolved disputes, however, is cause for pause.
Avoiding Storm-Chaser Scams and Unlicensed Workers
After a major hailstorm, it’s tempting to hire the first company that shows up offering “free inspection and immediate repairs.” But door-to-door salespeople who pressure you to sign on the spot often subcontract the work or cut corners on materials. Here are some warning signs:
- Cash-only deals with no written estimate
- Vague scope of work or change-order clauses that allow price hikes
- No long-term warranty—or an offer to install cheaper, off-brand siding
Stick with contractors who provide clear, itemized quotes and are willing to walk you through each line item. Legitimate companies—like H&F Exteriors—offer free inspections but back them up with detailed reports and firm, written agreements. By doing your homework on licensing, references, and red flags, you’ll find a partner who can bring your siding back to life without surprise costs or shoddy workmanship.
Step 8: DIY Repair Techniques for Minor Vinyl Siding Damage
Tackling small dents and hairline cracks in vinyl siding can be a cost-effective weekend project—provided the damage is limited and the surrounding panels are structurally sound. If you’ve spotted isolated nick-sized depressions or tiny fractures (less than ½″), a DIY repair can restore your siding’s appearance and keep moisture at bay. Before you grab your tools, make sure the siding is completely dry and free of mud or debris. With the right materials and a steady hand, you’ll blend repairs seamlessly into your home’s exterior.
Repair Kits and Materials You’ll Need
• Vinyl repair putty or filler (often sold in weatherproof cartridges)
• Plastic welding kit for vinyl (optional for deeper cracks)
• Exterior-grade vinyl touch-up paint
• Scraper or putty knife
• Caulk gun (for repair putty cartridges)
• Utility knife
• Fine-grit sandpaper (220–320 grit)
• Cleaning solution (mild detergent or isopropyl alcohol)
For more specialized guidance, the team at Empire Exterior Services offers step-by-step videos and product recommendations that can help homeowners get professional results.
Step-by-Step: Patching Small Holes and Cracks
- Clean the Repair Area
Use mild detergent or isopropyl alcohol to remove dirt, mold, and any loose vinyl fragments. Rinse with water and let the panel dry completely—moisture trapped under filler will cause bubbles or poor adhesion. - Prepare the Surface
Lightly sand around the dent or crack to give the filler a “key.” Wipe away sanding dust with a soft cloth. - Apply Vinyl Repair Putty
Load the putty into your caulk gun and press a small bead into the damaged spot. Overfill slightly to allow for shrinkage as the material cures. For cracks deeper than 1⁄8″, consider using a plastic welding kit first: splice in a thin vinyl patch, melt the edges, then cover with putty. - Smooth and Shape
Use a putty knife or scraper held at a low angle to shave off excess filler. Aim for a flush finish that follows the siding’s contours. Let the patch cure per the product instructions—usually 30 minutes to 1 hour. - Sand Lightly
Once fully cured, sand the repair area with fine-grit paper until smooth. Remove any dust with a dry cloth.
Refinishing and Matching Color to Existing Sections
Even the best filler stands out if the color doesn’t match. Choose an exterior vinyl touch-up paint that closely matches your siding’s shade. Test the paint on a scrap piece or inconspicuous corner first.
• Apply a thin coat of paint over the repair with a small brush.
• Feather the edges by lightly brushing outward from the center, letting the color blend into the old panel.
• Allow the paint to dry, then assess whether a second, even lighter coat is needed.
When done correctly, patched areas will virtually disappear from normal viewing distances, preserving both your home’s curb appeal and its protective weather barrier.
Step 9: What to Expect During a Professional Repair
Hiring a pro to restore your siding means leaning on experienced teams, proven materials, and a structured workflow. While DIY fixes can tackle a few dings, a professional siding contractor brings a systematic approach that ensures long-term performance and curb appeal. In the next few subsections, you’ll learn what typically happens from start to finish, how to spot quality workmanship, and what happens when the crew packs up and hands the project back to you.
Overview of the Contractor’s Repair Process
Once the contract is signed and permits (if required) are in place, the repair team usually follows a familiar sequence:
- Removal of Damaged Panels
Technicians gently pry off dented or cracked boards, preserving surrounding sections. This step exposes the underlayment and framing, allowing a chance to check for hidden moisture or wood rot. - Inspection and Preparation
With the old material off, the crew examines sheathing for mold or water damage. They apply flashing or moisture barrier tape where needed—especially around windows, corners, and other vulnerable spots. - Installation of Replacement Panels
New siding panels are cut to size, aligned for even reveals, and fastened with corrosion-resistant nails or screws. Pro teams maintain manufacturer-recommended spacing to allow thermal expansion and prevent buckling. - Sealing and Finishing
All joints, trim corners, and fastener heads receive caulk or specialized sealant to block water intrusion. If color-matched panels aren’t available, painters may blend and touch up to create a cohesive look.
This ordered approach minimizes surprises and delays. By the time the final panel snaps into place, most of the heavy lifting is already done—and a lasting weather barrier is restored.
Ensuring Quality Materials and Workmanship
Good contractors don’t cut corners on supplies or shortcuts on technique. Here’s how to verify you’re getting the real deal:
- Manufacturer-Grade Siding
Insist on A-grade or premium-line panels from reputable brands. Higher grade often means thicker lock edges, consistent color, and longer warranties. - Approved Underlayments and Flashings
Quality jobs pair siding with water-resistant house wrap and metal flashings rated for your climate. Look for well-lapped seams and secure tape transitions. - Proper Fasteners
Ask about the type and spacing of nails or screws. Corrosion-resistant stainless steel or galvanized fasteners reduce the chance of rust stains and maintain proper holding strength over the years. - Clean, Uniform Installation
Check that panels lie flat, with straight sight lines and consistent reveal heights. Even small misalignments can become glaring over time.
When the crew pauses for a coffee break, walk the perimeter and ask questions: which brand of siding you selected, how they plan to handle tricky corners, and how they’ll ensure a tight seal around penetrations. A confident contractor will welcome the conversation and demonstrate pride in their craft.
Final Inspection and Project Sign-Off
Before you hand over the final payment, it’s critical to walk through the project with your contractor:
- Side-by-Side Walkthrough
Compare each repaired section to the original undamaged areas. Look for color match, straight lines, and consistent caulking. - Check for Clean-Up
Make sure all nails, scraps, and debris are removed. A tidy site is a good indicator of a conscientious crew. - Warranty and Maintenance Guidelines
Request written details on manufacturer warranties for materials and labor guarantees. Ask about any recommended upkeep—like annual caulk checks or gentle wash-downs.
Once you’re satisfied that every panel, trim piece, and seal is solid, sign off on the completion form. Retain copies of the contract, warranty documents, and any maintenance instructions. With that, you’ve taken the final step toward restoring your home’s resilience—and ensuring its siding stands strong through the next hailstorm.
Step 10: Upgrade Options: Impact-Resistant Materials and Innovations
When hailstorms become an almost-annual rite of spring, upgrading to impact-resistant siding turns your repair into a long-term investment. Today’s market offers a range of materials engineered to shrug off hail damage, along with cutting-edge treatments that add a layer of protection. Here’s a look at proven options—from traditional fiber cement to emerging self-healing surfaces—so you can balance cost, lifespan, and performance.
Fiber Cement, Engineered Wood, and Metal Options
Fiber cement, engineered wood, and metal siding stand out for their durability and hail resistance:
- Fiber Cement
- Pros: Rigid, non-combustible, resists rot and insects. Typical hail-resistance rating up to 2″ stones.
- Cons: Heavier weight may require extra framing support; can chip on extreme impacts.
- Cost: $5–$12 per sq. ft.
- Engineered Wood
- Pros: Real wood texture with resin-enhanced core for extra flexibility; handles 1.5″ storms with minimal cracking.
- Cons: Vulnerable to moisture if sealant fails; periodic repainting or staining needed.
- Cost: $4–$8 per sq. ft.
- Metal (Steel or Aluminum)
- Pros: Excellent rigidity, available in thicker gauges rated for 2″–3″ hail; fire- and insect-resistant.
- Cons: Higher initial cost; thinner gauges dent visibly; professional installation required.
- Cost: $6–$15 per sq. ft.
Each of these materials offers a measurable upgrade over standard vinyl—trading a few extra dollars per square foot for a significant boost in storm resilience.
Advanced Protective Solutions: Nano-Coatings and Self-Healing Siding
Beyond core materials, surface treatments and coatings can add another line of defense:
- Nano-Coatings
These ultra-thin treatments bond to siding surfaces at the molecular level, creating a hydrophobic barrier that repels water and deflects small impacts. Applied via spray or roll-on, nano-coatings reduce surface abrasion and discoloration, extending the life of your panels. - Self-Healing Polymers
In pilot applications, polymers infused into siding panels can “heal” minor scratches and dents over time. Brands pioneering this technology—highlighted by Tiger Adjusters—report that small indentations smooth out with heat or sunlight exposure, maintaining a flawless finish without manual touch-ups.
While still emerging, these innovations promise to make future hail damage virtually invisible and are worth discussing with your contractor if you’re aiming for premier protection.
Weighing Cost, Lifespan, and ROI
Choosing the right upgrade comes down to balancing upfront cost, expected lifespan, and long-term value. Here’s a quick comparison:
Material/Feature Cost (per sq. ft.) Expected Life Maintenance Hail Rating Fiber Cement $5–$12 30–50 years Seal every 5–10 years Up to 2″–2.5″ Engineered Wood $4–$8 20–30 years Repaint or stain as needed Up to 1.5″ Metal (Steel/Aluminum) $6–$15 40–60 years Repaint if scratched Up to 3″ Nano-Coating (add-on) $0.50–$1.50 5–10 years Annual wash Deflects small impacts Self-Healing Siding (pilot) N/A N/A Auto-repair with heat/light Varies by product When hail risk is high, materials and treatments with superior impact ratings can pay off through fewer repairs, lower insurance claims, and stronger curb appeal—especially if you plan to sell. Factor in your local climate, resale timeline, and maintenance preference to select the siding upgrade that best aligns with your budget and peace-of-mind goals.
Step 11: Keep Your Siding Protected and Maintained
Routine inspections and ongoing maintenance aren’t just about keeping your home looking sharp— they’re the best defense against hidden damage and premature wear. In Colorado’s mix of sun, snow, wind, and hail, staying proactive ensures your siding continues to shield your home year after year.
Routine Inspection Schedule
Set a twice-annual reminder—once in spring and again in fall—for a quick siding check. After winter’s freeze-thaw cycles, look for new cracks, loose panels, or gaps around trim and fasteners. Then, post-summer, scan for dents, discoloration, or sealant breakdown after any hail or high-wind events. Keep a simple log of dates and findings; over time, you’ll recognize patterns—perhaps a specific corner that traps moisture or a panel that tends to loosen—so you can address them before they escalate.
Seasonal Maintenance Tips
A few small tasks each season go a long way toward extending your siding’s life:
- Clean gutters and downspouts
Blocked gutters can overflow and saturate the bottom rows of siding, leading to staining or rot. - Flush siding with a soft wash
A garden hose or low-pressure washer removes pollen, dirt, and mildew without damaging panels. - Reseal caulk joints and trim
Inspect seams around windows, doors, and corners. Replace any cracked or pulled-away caulk to keep moisture out. - Trim vegetation back
Branches and vines can scratch siding and trap water against panels—maintain a few feet of clearance to promote airflow and drying.
These simple steps help prevent common issues like mold growth, paint failure, and wood swelling.
When to Schedule a Follow-Up Inspection
Even the most careful homeowner can miss concealed problems. After any severe weather event—especially hailstorms or wind gusts—consider a professional check from an exterior specialist such as Super Siders. They can use moisture meters, ladders, and trained eyes to uncover damage hidden behind panels or under flashings. It’s also wise to align these inspections with your regular roof maintenance visits. A contractor on your roof can spot flashing gaps or sheathing leaks that might otherwise go unnoticed.
By blending these hands-on routines with occasional expert assessments, you’ll keep your siding—and the structure it protects—in peak condition through every Colorado season.
Ready to Restore Your Home’s Exterior?
Your home deserves a siding solution that’s as resilient as Colorado’s weather is relentless. By following this guide—spotting hail damage early, documenting every dent and crack, and choosing the right repair path—you’ve armed yourself with the know-how to protect your investment and keep moisture at bay. Whether you tackle small vinyl dents with a repair kit or work with professionals to replace storm-ruined panels, acting promptly prevents minor blemishes from snowballing into major structural headaches.
At Semper Fi Restoration, we combine Marine Corps–inspired discipline with years of storm-damage expertise to deliver quality repairs and durable upgrades. Our veteran-owned team handles everything from insurance claim assistance to impact-resistant siding installations, ensuring your exterior stands strong against whatever Mother Nature sends next.
Reach out today for a free roof and siding assessment and experience restoration service rooted in integrity, precision, and an unwavering commitment to excellence. Let us help you restore and reinforce your home’s first line of defense—so you can enjoy Colorado’s beauty without worrying about what’s overhead.
Leave nothing to chance—secure your home’s exterior with Semper Fi Restoration and rest easy through every storm.
We'd love to do a complimentary roofing assessment for you!